This is what the bracket in question looks like. The door stay is attached to it by means of a roll pin.
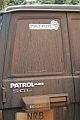
In order to gain access to the body apperture where the little bracket is supposed to be attached, the dummy tail lamp cluster on the right hand side has to be removed.
The first step is to undo two bolts that are found inside the jack storage compartment:
Here they are:
Once both bolts are removed, the inboard edge of the tail lamp cluster will be free, but the outboard edge is still held by two clips.
Here is a picture of those clips. It is important to apply force in the correct direction (more towards the outboard side than the rear) in order to get the clips to disengage without damaging the tail lamp cluster:
Once the roll pin was knocked out to free the bracket from the stay and the bracket itself removed via the aperture where the tail lamp cluster used to be, this is what I found in the cavity behind the lamp:
One can clearly see where the two little spot welds on each side failed. The slightly deformed edge of the bracket aperture can also be seen on the right hand side. This is the cause of the clacking noise.
This is what the failed spot welds look like on the bracket side:
OK, now on to the fix: The first step is to drill two holes in the bracket. I drilled holes for M6 fasteners. Make sure that you use good quality, sharp drill bits: that little bracket seems to be made out of high strength steel.
Now try to place the bracket back in its correct place with the "puzzle pieces" where the spot welds broke out fitting together correctly so as to locate the bracket in its original location. Mark the correct position on the opposite (door side). I used masking tape to assist with this and my son provided the additional pair of hands needed (His slim 11 year old hands were also invaluable when I clumsily dropped the bracket into the bowels of the body below the light apperture...).
Here the holes have been drilled in the body:
The final steps are to take some rust prevention steps, both on the door side and inside the light apperture and to bolt the bracket in place. I used two M6 high strength set screws, washers and high strength Ny-loc nuts on the inside.
The door is now beautifully smooth and silent.
P.S. Please excuse the dodgy cell phone camera pictures...