Page 2 of 3
Re: Sani Rear Bumper/Towbar
Posted: 25 Nov 2013 19:52
by ChristoSlang
Davy, I found a few fody!
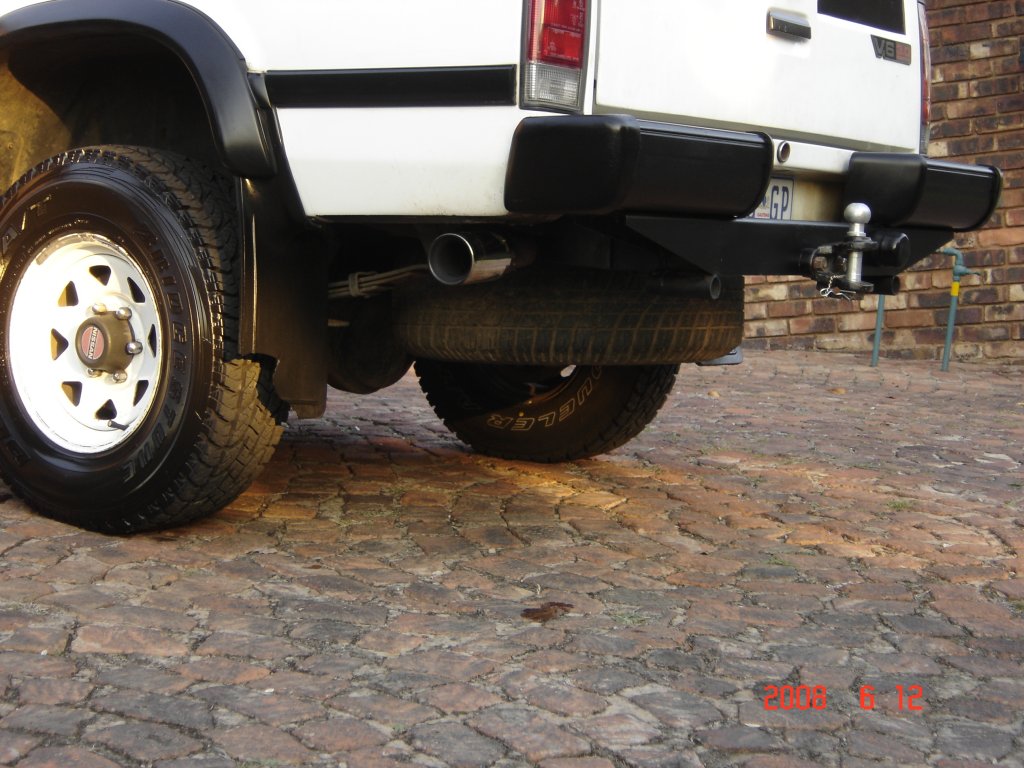
- Sani Mk II with Isuzu bumper
- dsc00599a.jpg (150.21 KiB) Viewed 3954 times
Re: Sani Rear Bumper/Towbar
Posted: 25 Nov 2013 20:23
by Tinus lotz
Re: Sani Rear Bumper/Towbar
Posted: 26 Nov 2013 10:37
by davidvdm
I really like the pipe idea, but want to, no wait, have to use as much of what I have due to budget. The tow bar seemed a good foundation to work from. The pipe type bumper does not really allow for a good system for a spare wheel carrier. I can see my spare wheel is going to be an issue with the new bumper as the lowest part of the car is no longer the tow ball, but the spare wheel.
Yesterday spent a few hours into the dark on this project, work is darn slow when you don't have the tools for the job. Baby grinder and my last two blades just to cut the recovery points flat bar to size to fit on the tow bar.
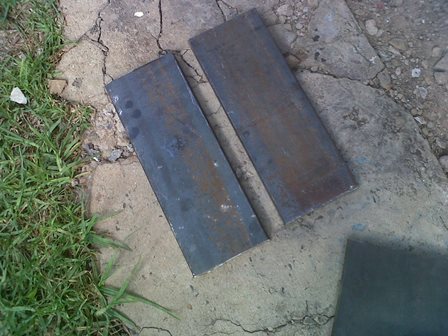
- IMG00208-20131125-1704.jpg (47.24 KiB) Viewed 3941 times
- IMG00209-20131125-1705.jpg (30.05 KiB) Viewed 3941 times
- IMG00210-20131125-1715.jpg (38.3 KiB) Viewed 3941 times
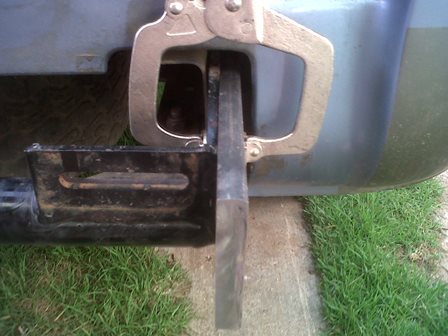
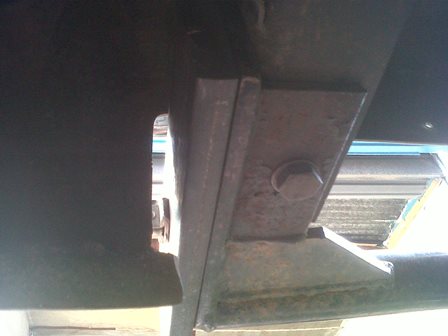
Clamped in place and marked the holes for the bolts that are going to attach this whole thing to the chassis. I am thinking of going slightly bigger on the bolts, from 12mm to maybe 18mm (just because I have a 18mm drill bit

)
Anyway, the 12mm holes are drilled, all six of them and line up perfectly. Also drilled the pilot hole for the 22mm hole on the end for the recovery point and trimmed the sharp edges off the recovery points where they are going to stick through the bumper.
- IMG00211-20131125-1715.jpg (25.94 KiB) Viewed 3941 times

- IMG00214-20131125-1716.jpg (53.13 KiB) Viewed 3941 times
By the time I had been swinging the hand drill and hacksaw around for nearly four hours it was to dark to expect a blackberry to take anything meaningful. The recovery points are now at our local auto electrician who happens to have a full workshop which includes a drill press that can drill those 22mm recovery point holes. I had to just give up and get some outside help on this as my full set of hole saw's are missing in action, I think they were taken at the last affirmative shopping session we had.
Re: Sani Rear Bumper/Towbar
Posted: 26 Nov 2013 10:42
by davidvdm
Thanks Christo, yip, that is the one I thought you were referring to. Strange enough at our last outing at Berakha, there was an obstacle where all the Toys and Isuzus bashed that specific bumper, and my Sani made it through with massive clearance, go figure, I thought my bumper was to long and low.
Re: Sani Rear Bumper/Towbar
Posted: 26 Nov 2013 11:05
by davidvdm
Stuck at "work" again till 3pm, just hate it when work interferes with my projects like this.
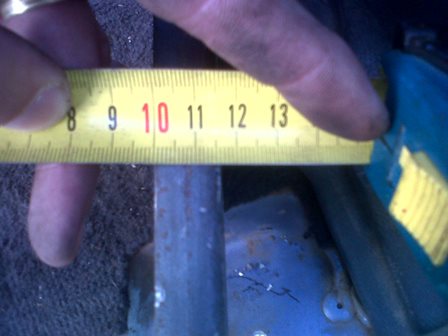
Will do the final measurements for the new bolts and hopefully track down some better than 8.8 HT bolts of sufficient length to get through the 16mm recovery point plus the 6mm tow bar, plus the 3mm chassis member, plus the 10mm backing plate I am adding to the inside of the chassis member.
If the recovery "shafts" are all ok and according to spec, they will first get bolted into place onto the tow bar, and then welded permanently.
I was hoping Peter Conan would have given some comment on this thread by now before I do the welding.
I think I am all ok with what I am doing so far. The tow bar can only be stronger after the shortening with less leverage on the section down to the drop plate.
After this, the "wings" to the outside to under the tail lights need to be figured out. They need to be strong enough to take a spare wheel carrier on each end.
My thinking however is that the spare wheel will be carried under the car anyway in town driving. For our little trails we frequent now and then, a single carrier will be attached that carries the wheel in the center of the car with no need to attach additional lights. For the off chance I actually get to enjoy and overlanding trip one day, two shorter carriers can be installed, one on each end of the bumper.
These carriers will need to be fitted with tail lights as the wheels will cover the standard lights.
So a total of three spare wheel carriers are on the cards, but I only need to build one as part of this build, or shortly thereafter.
Re: Sani Rear Bumper/Towbar
Posted: 26 Nov 2013 21:41
by Tinus lotz
piet has got issues with his internet give him a tinkle
Re: Sani Rear Bumper/Towbar
Posted: 27 Nov 2013 07:01
by Peter Connan
Sorry David
i have 1/2 hour internet per day, and it's just not enough to read anything with full attention.
While i didn't see anything to fill me with fear, you are welcome to mail me the detail for an opinion?
Re: Sani Rear Bumper/Towbar
Posted: 27 Nov 2013 09:40
by davidvdm
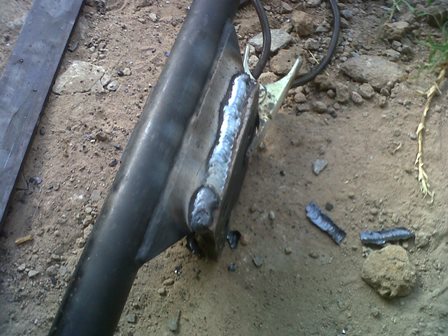
No problem Peter. The project has now got to a point that there is no easy way to turn back. Another ten 5mm welding rods got laid on yesterday.

- IMG00215-20131126-1715.jpg (56.62 KiB) Viewed 3919 times
Yesterday the recovery points were drilled out to 22mm and the two were ready for installation to the tow bar. I’ve been waiting for this opportunity to remove the tow bar again to also get the welding done properly on the new drop plate that was better sized to fit after the shortening of the “gooseneck”. I did an accurate measurement to find that I actually shortened the tow bar by 150mm.
With the power problems we have here, I opted to borrow an inverter welder for the day. I have never welded with one of these before, but it made life much easier compared to the old oil welder I have.
No comments about the welding please, I’ve never professed to being a good welder.
- IMG00216-20131126-1808.jpg (47.91 KiB) Viewed 3919 times
- IMG00217-20131126-1830.jpg (42.25 KiB) Viewed 3919 times
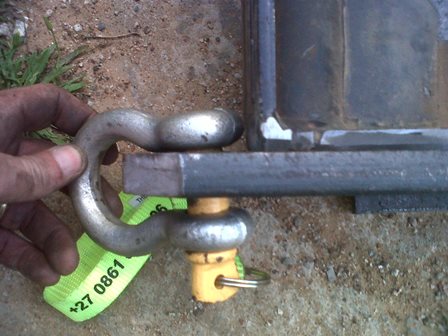
And here is my first oops, holes marked and pilot holes drilled to deep from the tip of the recovery point. I now have very little space left when a shackle is in the hole. In fact, the back of the shackle can twist to touch the original tow bar. I don’t know what forces this may put on a shackle and if it can cause problems. I will be chatting to our engineering shop to see if he has a machine that can sort this out. I have thought of just extending the hole by 5-10mm to the end of the recovery point to make it a slot instead of just a hole.
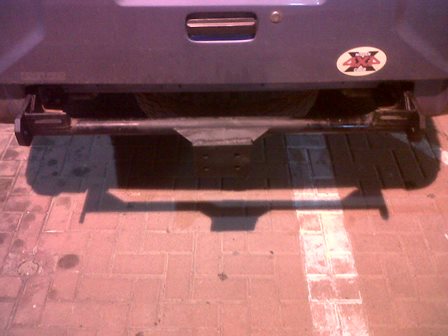
Welded it all up until nightfall stopped work again, but I got to where I wanted and just laid a dash of spray paint over all the exposed metal to keep it from rusting till the next phase of work.
Some more pics of it back on the car.

- IMG00219-20131126-2054.jpg (33.8 KiB) Viewed 3919 times
- IMG00221-20131126-2055.jpg (31.35 KiB) Viewed 3919 times

- IMG00223-20131126-2056.jpg (32.69 KiB) Viewed 3919 times

- IMG00231-20131126-2100.jpg (35.85 KiB) Viewed 3919 times
Now deciding what is going to be the best option to cover the top and rear faces. Those darn holes that are wrong are now messing me around. Thinking of either cutting those little vertical brackets away to allow space for the shackles, or take to the holes with a file. Could take a while to file away 10mm in 16mm thick flat bar.
Oh, and I still have to figure where I am going to add my hi-lift jack points and contemplating bringing the exhaust out the back again if there is enough space to do so.
Re: Sani Rear Bumper/Towbar
Posted: 27 Nov 2013 11:09
by Kagiso II
Davy -- I gave Wimpy O the old aluminium bumper "covers" with Boezman -- MAAR boezman mos has that moerova steel twin spêrrwiel kerrier mos so Wimpi is mos not gonna jooz it
Ask him to give dounuyut 'em 4 yu -- they will just fit over that thin pipe mos ..
[hauw ar my Ingris 2 die?]
O K -- ernstig -- loop bikki n draa by di enuwer Hard Body en bekyk dai agter bumper -- as jy dionk dit kan werk sal ek vir Wimpi vra om daai alum covers oor te gooi . Dit le net in sy pad.
Re: Sani Rear Bumper/Towbar
Posted: 27 Nov 2013 11:49
by davidvdm
Oom, ek wil nou juis ook die twin sparewheel carrier ding doen. Daarin lê my volgende probleem met die beplanning. Om nou sterk genoeg te kan bou kante toe is ek nie nou so seker hoe nie.
Ek kyk ook weer netnou na die dinge, en dit lyk my nie ek baie "vleis" om mee te werk op die hoeke nie waar daai pivot vir die carrier moet vasgemaak word nie. Ek is vreeslik naby aan die bakwerk.