
SJC..... hmmmm actually the black flares do look good !!....
Trim Beading
-
ricster

- Patrolman 1000+

- Posts: 5850
- Joined: 13 Jan 2010 11:16
- Full Name: Cedric Warner
- Nickname: Cedric
- Home Town: Alberton Gauteng
- Current 4x4: '99 Nissan Patrol 4.2 Turbo Diesel
- Home Language: English
- Location: LA..... No not Los Angles ..... Lower Alberton, Gauteng
- Has thanked: 591 times
- Been thanked: 468 times
Re: Trim Beading
Nicely done Ian !!
SJC..... hmmmm actually the black flares do look good !!....
SJC..... hmmmm actually the black flares do look good !!....
Regards
Cedric
Nissan Patrol GL 4.2 Diesel Turbo (Iron Maiden)
Nissan SANI 3.0 V6 4x4 (SOLD)
Isuzu KB 280 DT 2x4 ('ol Smokey) - SOLD
Suzuki TL 1000R "V twin" (Growler) - SOLD
Cedric
Nissan Patrol GL 4.2 Diesel Turbo (Iron Maiden)
Nissan SANI 3.0 V6 4x4 (SOLD)
Isuzu KB 280 DT 2x4 ('ol Smokey) - SOLD
Suzuki TL 1000R "V twin" (Growler) - SOLD
-
Wilkie
- Patrolman 1000+
- Posts: 1402
- Joined: 24 Feb 2014 15:33
- Full Name: Errol Wilken
- Nickname: Wilkie
- Home Town: Pretoria
- Current 4x4: 1999 4.5 GRX Nissan Patrol
2004 BMW 3.0D X5 - Home Language: Afrikaans
- Has thanked: 69 times
- Been thanked: 92 times
Re: Trim Beading
SJC daai rooi monster lyk goed ....arme "plat anna" kry seker lekker skaam langs hom
Ian great job ,lyk blerrrie goed.......moet myne ook doen
Ian great job ,lyk blerrrie goed.......moet myne ook doen
-
SJC
- Patrolman 1000+
- Posts: 3202
- Joined: 23 Nov 2014 14:20
- Full Name: SJC
- Nickname: Fanus
- Home Town: Nelspruit
- Current 4x4: 4.2 GQ (TB42)
- Home Language: Afrikaans/English
- Has thanked: 200 times
- Been thanked: 171 times
Re: Trim Beading
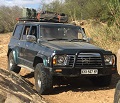
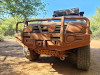
Daai is nie myne nie, wys net hoe die rooi gu sou lyk met swart flares.Wilkie wrote:SJC daai rooi monster lyk goed ....arme "plat anna" kry seker lekker skaam langs hom
Ian great job ,lyk blerrrie goed.......moet myne ook doen
1996 Nissan Patrol 4.2 SGL
-
SJC
- Patrolman 1000+
- Posts: 3202
- Joined: 23 Nov 2014 14:20
- Full Name: SJC
- Nickname: Fanus
- Home Town: Nelspruit
- Current 4x4: 4.2 GQ (TB42)
- Home Language: Afrikaans/English
- Has thanked: 200 times
- Been thanked: 171 times
Re: Trim Beading
Dink ek sal Ian moet inspan om die flares vir my swart te verf... 
 WWW
WWW
1996 Nissan Patrol 4.2 SGL
-
iandvl
- Patrolman 1000+
- Posts: 1765
- Joined: 12 Jan 2015 13:26
- Full Name: Ian de Villiers
- Nickname: Ian
- Home Town: Garsfontein
- Current 4x4: Nissan Patrol 4.5 GRX
- Home Language: English
- Has thanked: 441 times
- Been thanked: 670 times
Re: Trim Beading
Jy's welkom. Maar ek is mos nie sharp verf persoon nie. Die bumper het mooi uitgekom. Maar dink dit was meer luck... :)SJC wrote:Dink ek sal Ian moet inspan om die flares vir my swart te verf...
Ian de Villiers
Patrol 4.5 GRX
Jurgens XT65 2x0 with Super Select Zero
ORRA: H80
Patrol 4.5 GRX
Jurgens XT65 2x0 with Super Select Zero
ORRA: H80
-
iandvl
- Patrolman 1000+
- Posts: 1765
- Joined: 12 Jan 2015 13:26
- Full Name: Ian de Villiers
- Nickname: Ian
- Home Town: Garsfontein
- Current 4x4: Nissan Patrol 4.5 GRX
- Home Language: English
- Has thanked: 441 times
- Been thanked: 670 times
Re: Trim Beading
Right - my final post on this matter. Just a few of the "gotchas" I picked up during this process.
1: The plastic trim bits make use of two different types of male pins. White pastic ones, and black plastic ones. The black pins are used in all the circular female clips (one per piece of trim). The white pins are used elsewhere.
2: The trim bits use three different types of female clips. There are oval shaped ones, a single circular clip per trim piece, and a weird, 45-degree angled bit for each of the trim pieces which sit on the door. The circular and oval ones are easy to get. I've not tracked down the 45-degree angled ones yet, so when removing the trim from the back doors be very careful not to break / lose them.
3: Every piece of trim has a single circular female clip with a black pin which fits into this. I think this is more-or-less a "key" mounting point. I discovered that the trim generally comes off easier if this pin is removed first, as it is easier to shift the trim around a little once it is out (the rest of the pins are all in the oval clips, which allow a little more movement). When refitting the panel again, it is easier to clip in all the white pins first, and clip in the black pin last, for the same reason. I've highlighted their locations below. You will notice the patch of rust on my fender - I'll explain about this later.
4: The trim on the door has a screw which first needs to be removed from the inside of the door. There is a plastic cover stuck under the opening. Remove it, and simply remove the bolt.
5: My vehicle is old. The trim is relatively brittle. So be very careful when removing it. I broke a couple of clips on the inside of the trim when removing stuff. The stuff breaks off relatively cleanly, and it is easy to fix, so I'd suggest having some decent epoxy around in case this does happen.
6: As David mentioned, he found that silicon did not work particularly well (presumably because of the long curing time). I found that it worked fine - provided one gave it enough time to cure steadily. I used "mamma se haar-rekkies en wasgoed pennetjies". Basically, I removed the trim in the morning and cleaned everything up. After that, I stuck the new beading to the trim, and left it for the rest of the day to cure nicely. The afternoon, I put everything back again.
7: The rust... My vehicle has done quite a bit. Whilst I look after it very well, it does it's fair share of trails, dirty roads and similar. It gets cleaned regularly though. The thing that scared me was the amount of mud which had built up inside the wheel arch over time - there behind the piece of plastic which keeps it sealed. No idea how it gets in, but this would probably be how the rust inside the plastic trim on the front fenders started. It's something I need to address. I've oiled it and similar, but this is beyond my painting skills, and I'll need to take it somewhere to be fixed properly. I could have planted potatoes inside my wheel arches... :(
Anyways, that is that. Ultimately, it's not a difficult job, but don't be in a rush to do it.
Clip count per arch:
Rear fender trim
---------------------
Black male clips: 1
White male clips: 5
Oval female clips: 5
Circular female clips: 1
Rear door trim
------------------
Black male clips: 1
White male clips: 2
Oval female clips: 1
Circular female clips: 1
45-degree female clips: 1
Front door trim
--------------------
Black male clips: 1
White male clips: 6
Oval female clips: 6
Circular female clips: 1
I bought 12M of trim, and I guess I have about 2.5M left. So work on a reasonably amount of trim...
Hope this helps someone
1: The plastic trim bits make use of two different types of male pins. White pastic ones, and black plastic ones. The black pins are used in all the circular female clips (one per piece of trim). The white pins are used elsewhere.
- male-1.jpg (17.24 KiB) Viewed 11928 times
- male-2.jpg (39.28 KiB) Viewed 11928 times
- female3.jpg (1.06 KiB) Viewed 11928 times
- female2.jpg (29.87 KiB) Viewed 11928 times
- female1.jpg (18.98 KiB) Viewed 11928 times
- location-2.jpg (172.77 KiB) Viewed 11928 times
- location-1.jpg (125.08 KiB) Viewed 11928 times
- screw.jpg (93.88 KiB) Viewed 11928 times
6: As David mentioned, he found that silicon did not work particularly well (presumably because of the long curing time). I found that it worked fine - provided one gave it enough time to cure steadily. I used "mamma se haar-rekkies en wasgoed pennetjies". Basically, I removed the trim in the morning and cleaned everything up. After that, I stuck the new beading to the trim, and left it for the rest of the day to cure nicely. The afternoon, I put everything back again.
7: The rust... My vehicle has done quite a bit. Whilst I look after it very well, it does it's fair share of trails, dirty roads and similar. It gets cleaned regularly though. The thing that scared me was the amount of mud which had built up inside the wheel arch over time - there behind the piece of plastic which keeps it sealed. No idea how it gets in, but this would probably be how the rust inside the plastic trim on the front fenders started. It's something I need to address. I've oiled it and similar, but this is beyond my painting skills, and I'll need to take it somewhere to be fixed properly. I could have planted potatoes inside my wheel arches... :(
- BEADING.jpg (149.38 KiB) Viewed 11928 times
Clip count per arch:
Rear fender trim
---------------------
Black male clips: 1
White male clips: 5
Oval female clips: 5
Circular female clips: 1
Rear door trim
------------------
Black male clips: 1
White male clips: 2
Oval female clips: 1
Circular female clips: 1
45-degree female clips: 1
Front door trim
--------------------
Black male clips: 1
White male clips: 6
Oval female clips: 6
Circular female clips: 1
I bought 12M of trim, and I guess I have about 2.5M left. So work on a reasonably amount of trim...
Hope this helps someone
Ian de Villiers
Patrol 4.5 GRX
Jurgens XT65 2x0 with Super Select Zero
ORRA: H80
Patrol 4.5 GRX
Jurgens XT65 2x0 with Super Select Zero
ORRA: H80
-
Nissan KingCab

- Senior Member

- Posts: 138
- Joined: 04 Jan 2015 09:43
- Full Name: Danie
- Nickname: Danie
- Home Town: Madibeng
- Current 4x4: 2005 Nissan Patrol 4.8 GRX
2001 Nissan Patrol 4.5 GL (SOLD) - Home Language: Afr
- Location: Madibeng
- Has thanked: 45 times
- Been thanked: 26 times
Re: Trim Beading
So baie detail! Dankie vir die post, ek glo daar is 'n paar ouens wat sal baat met die inligting.
Ek is een van hulle, een van my flares op agterdeur hang nog net aan 1 of 2 clips.
Ek is een van hulle, een van my flares op agterdeur hang nog net aan 1 of 2 clips.
-
iandvl
- Patrolman 1000+
- Posts: 1765
- Joined: 12 Jan 2015 13:26
- Full Name: Ian de Villiers
- Nickname: Ian
- Home Town: Garsfontein
- Current 4x4: Nissan Patrol 4.5 GRX
- Home Language: English
- Has thanked: 441 times
- Been thanked: 670 times
Re: Trim Beading
Kom maak 'n draai. Het nog 'n paar spaar clips, en ek kan deesdae in 'n paar minute die goed vervang... Practice makes perfect... :)Nissan KingCab wrote:So baie detail! Dankie vir die post, ek glo daar is 'n paar ouens wat sal baat met die inligting.
Ek is een van hulle, een van my flares op agterdeur hang nog net aan 1 of 2 clips.
Ian de Villiers
Patrol 4.5 GRX
Jurgens XT65 2x0 with Super Select Zero
ORRA: H80
Patrol 4.5 GRX
Jurgens XT65 2x0 with Super Select Zero
ORRA: H80
-
David M

- Patrolman

- Posts: 794
- Joined: 12 Nov 2013 15:13
- Full Name: David Marais
- Nickname: David Marais
- Home Town: Midrand
- Current 4x4: 1998 4.5 GL Patrol
2006 4.2 Td Bakkie (SWAMBO's) - The "Firetruck" - Home Language: English
- Location: Midrand
- Has thanked: 20 times
- Been thanked: 96 times
Re: Trim Beading
- Clips.jpg (2.85 MiB) Viewed 10953 times
There are still places out there!!!! - Daniel Goz - The "Tapam" movie
Who is online
Users browsing this forum: No registered users and 24 guests